> For the complete documentation index, see [llms.txt](https://zon.gitbook.io/zon-staff/llms.txt). Markdown versions of documentation pages are available by appending `.md` to page URLs; this page is available as [Markdown](https://zon.gitbook.io/zon-staff/zon-staff-management/how-to-configure-and-implement-staff-schedules-in-zon.md).
# 💡How to configure and implement staff schedules in Zon?🤔
### Creating Staff Shifts and Schedules in Zon Staff Management:
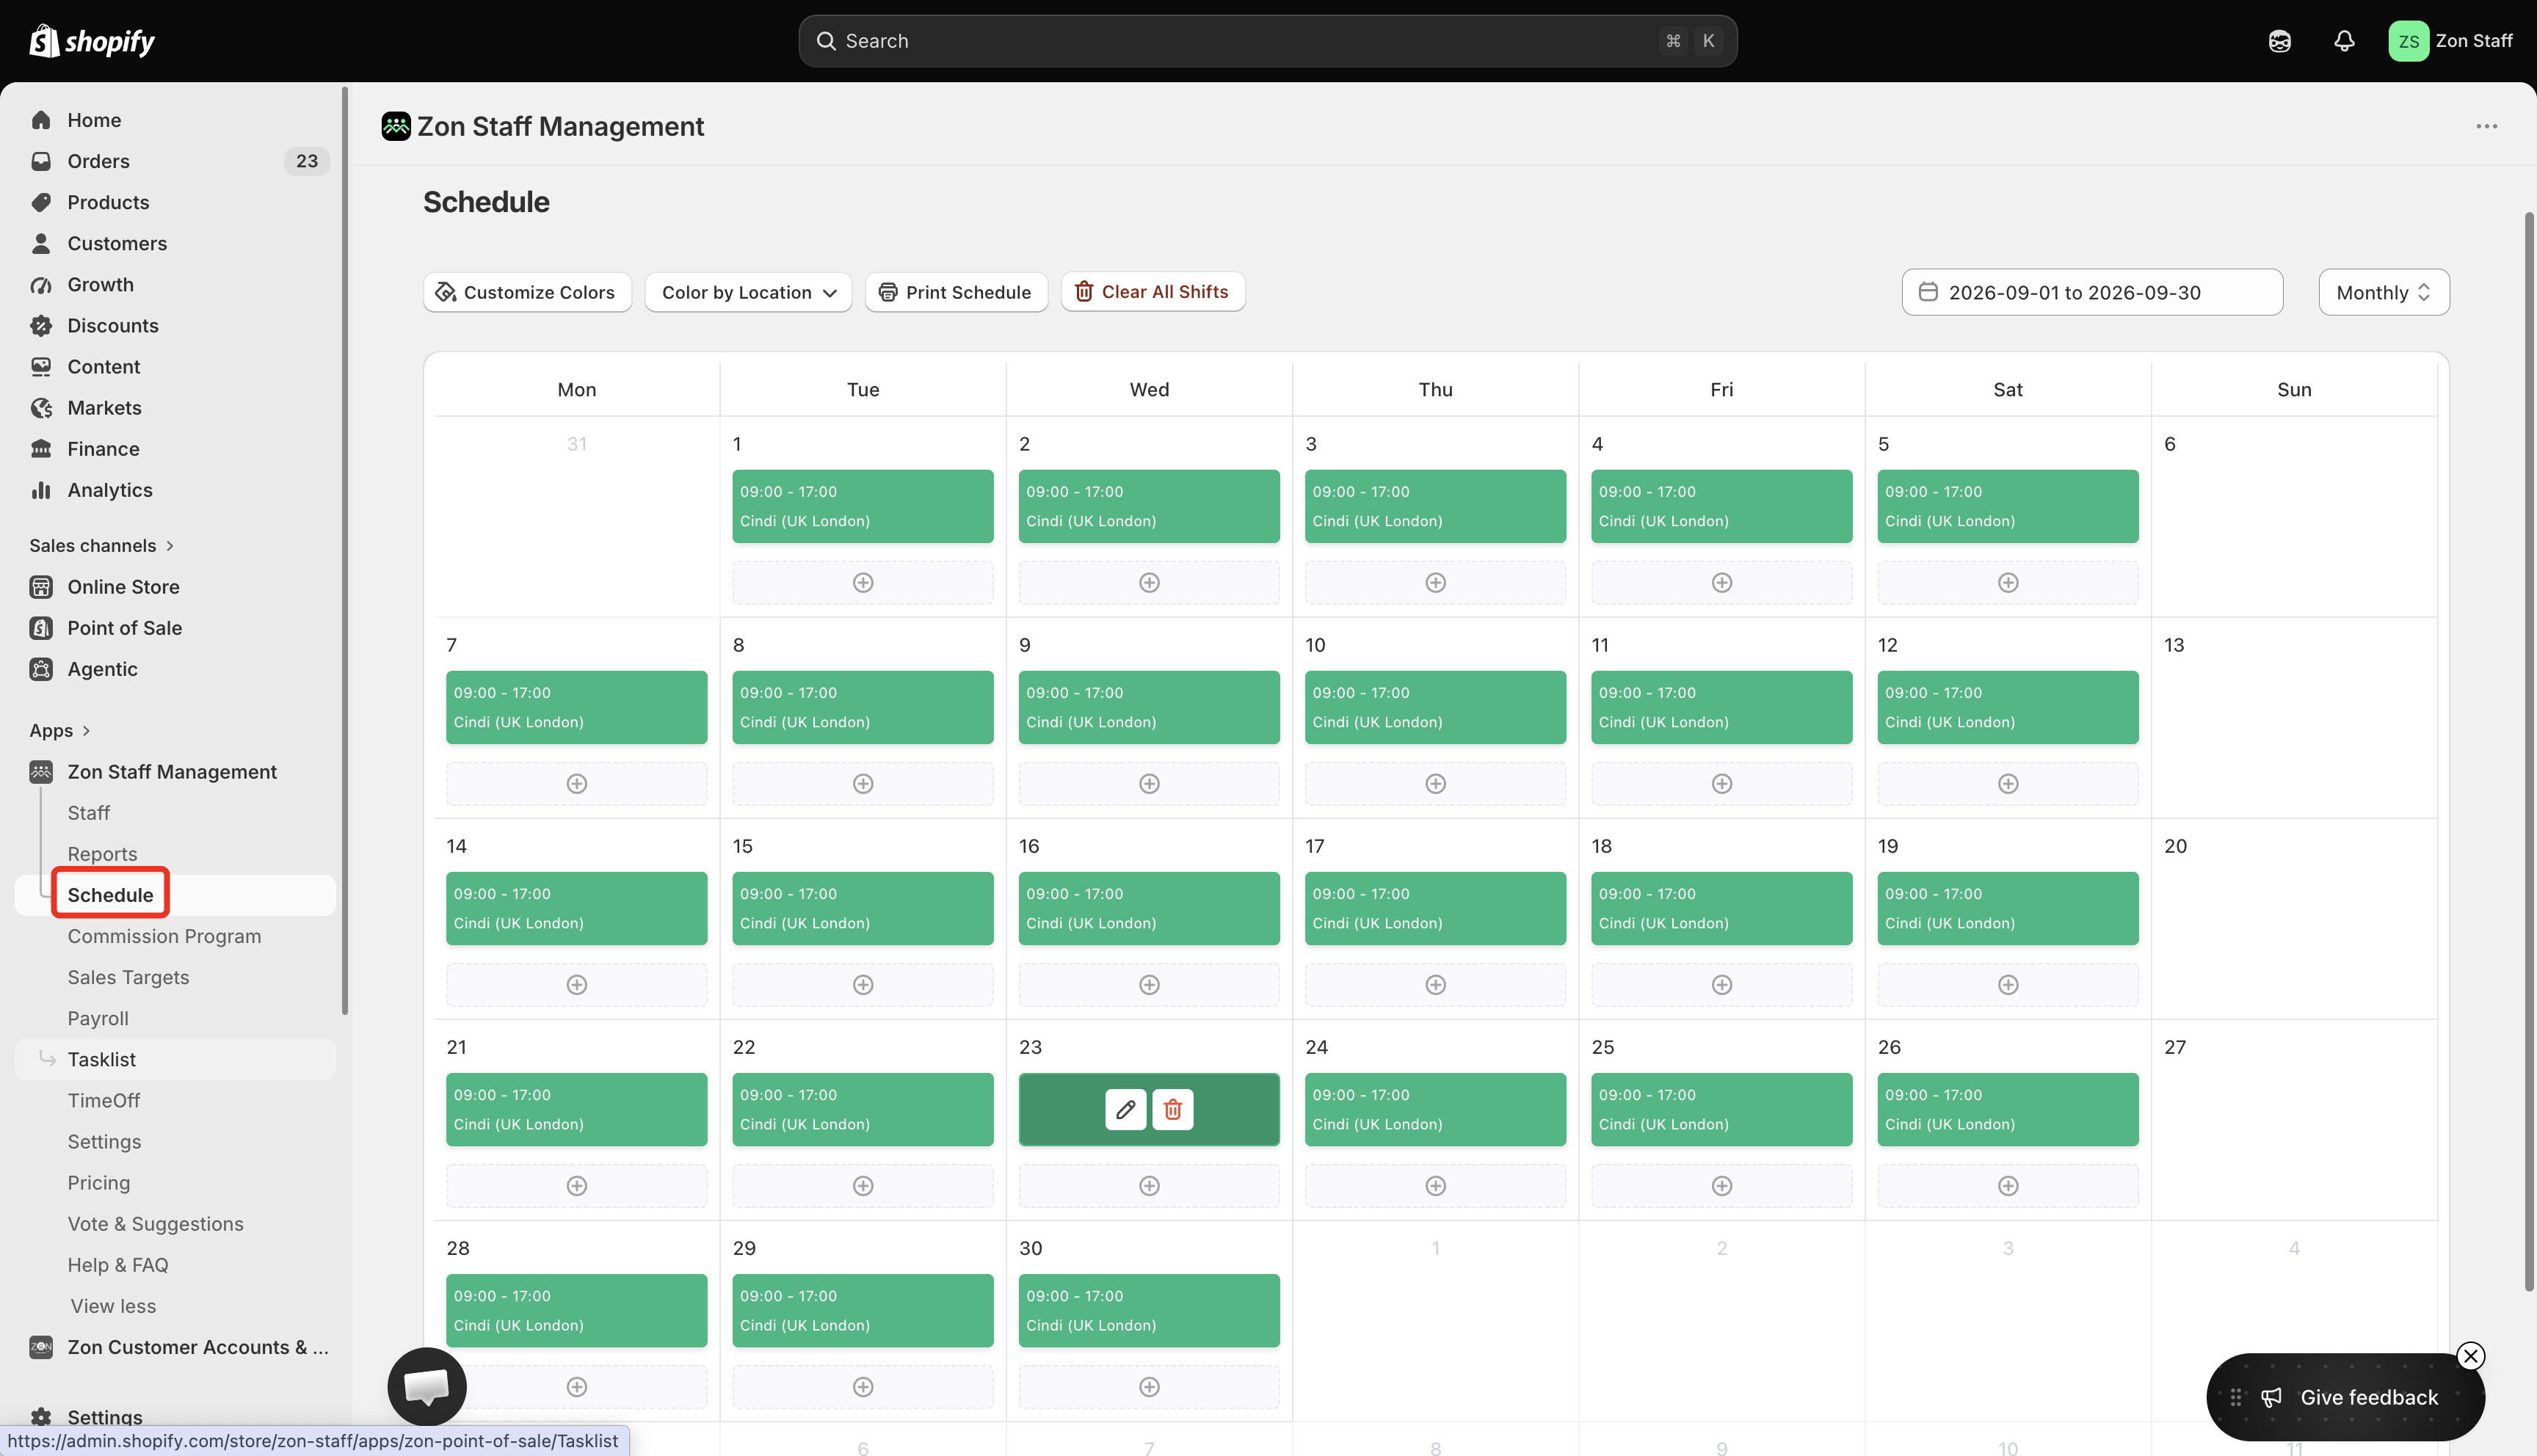
**Zon Staff Management** enables you to efficiently **create and manage** staff **shifts** directly from the **Schedule tab.** You can **schedule shifts** for **individual employees** for **a day, a week, a month or an entire year,** depending on your **operational needs.**
### How to Create a Shift:
**Navigate to the Schedule Tab:**
* From the **Zon Staff Management** dashboard in your **Shopify admin,** click on **Schedule** in the left-hand menu.
**Select the Date Range and View:**
* At the **top right**, choose your **preferred date range** (**weekly, monthly or yearly view**) to organize your **scheduling.**
**Add a Shift:**
* **Hover over** the **cell** corresponding to the **staff member** and the **day** you want to **schedule a shift.**
* Click the **+ icon** that appears.
**Fill in Shift Details:**
In the **Create Shift pop-up window:**
* **Staff:** Confirm the **staff member’s name** (or **pre-selected based on your cell choice**).
* **Location:** Select the **store or outlet location** where the staff will work.
* **Date:** Choose the **date for the shift.**
* **Start at / End at:** Enter the **shift start** and **end times** (e.g., 09:00 to 17:00).
* **Breaks: Optionally, add break periods** by specifying b**reak start** and **end times** (e.g., 13:30 to 14:30).
* **Repeat Shift:** **Check the box** if you want this **shift** to **repeat for the rest** of the **week, month or year.**
**Create the Shift:**\
\
Once all **details are entered**, click **Create Shift** to save the schedule.
**Once saved**, the **shift** will be **created** for the **selected time period** based on your configuration.
**Note:** Before scheduling shifts, ensure that **holiday settings** are properly configured in the Settings tab. This helps avoid assigning shifts on designated holidays.
## Customize Colors
The **Customize Colors** feature helps you organize and identify shifts more easily in the schedule. You can assign a specific color to a location or to an individual staff member, making it easier to distinguish between different shifts at a glance.
For example, you can assign one color to all shifts at a particular location or use a different color for each staff member. These color settings are independent, so changing the color for a location will not affect the color assigned to a staff member.
### Customize Colors for Locations
You can assign a custom color to each location so that all shifts associated with that location are displayed consistently on the schedule.
1. Open **Zon Staff Management** in Shopify admin.
2. Go to the **Schedule** tab.
3. Click **Customize Colors** at the top of the Schedule page.\
4. Under **Customize Colors For**, select **Locations**.
5. Under **Select Location**, choose the location you want to customize.
The location’s existing color will appear under **Current Color**. Choose a new color under **Choose New Color** and review how it appears in the **Preview**.
6. Click **Update Color** to apply the new color.\
The selected color will be applied to all shifts associated with that location, helping you identify them more easily on the schedule.
### Customize Colors for Staff
You can also assign a unique color to an individual staff member. This can be helpful when you want to quickly identify a staff member’s shifts without checking each shift individually.
1. Open **Zon Staff Management** in Shopify admin.
2. Go to the **Schedule** tab.
3. Click **Customize Colors** at the top of the Schedule page.
4. Under **Customize Colors For**, select **Staff**.
5. Under **Select Staff**, choose the staff member you want to customize.
The staff member’s existing color will appear under **Current Color**. Select a new color under **Choose New Color** and check the result in the **Preview**.
6. Click **Update Color** to save the changes.\
The selected color will be applied to that staff member’s shifts, making their schedule easier to recognize.
> **Note****:** Location colors and staff colors can be customized independently. Updating one does not change the other.