> For the complete documentation index, see [llms.txt](https://zon.gitbook.io/zon-staff/llms.txt). Markdown versions of documentation pages are available by appending `.md` to page URLs; this page is available as [Markdown](https://zon.gitbook.io/zon-staff/zon-staff-management/how-to-set-up-and-use-sales-targets-in-zon-staff-management.md).
# 💡How to Set Up and Use Sales Targets in Zon Staff Management?🤔
### Sales Targets
The **Sales Targets** feature in **Zon Staff Management** allows you to **create, assign**, and **track monthly sales targets** for **staff members** across different locations. This helps merchants monitor individual sales performance, accurately attribute completed sales, and measure progress toward **monthly goals** directly within **Shopify POS.**
The setup has three parts:
1. **Enable** the **Sales Targets extension** in the Shopify POS editor.
2. Add the **Sales Targets tile** in the Shopify POS app on the POS device.
3. **Create monthly sales targets** in the Zon Staff Management app.
### 1. Enable the Sales Targets Extension
The Sales Targets extension allows staff members to attribute completed sales to themselves from the order details or post-purchase screen.
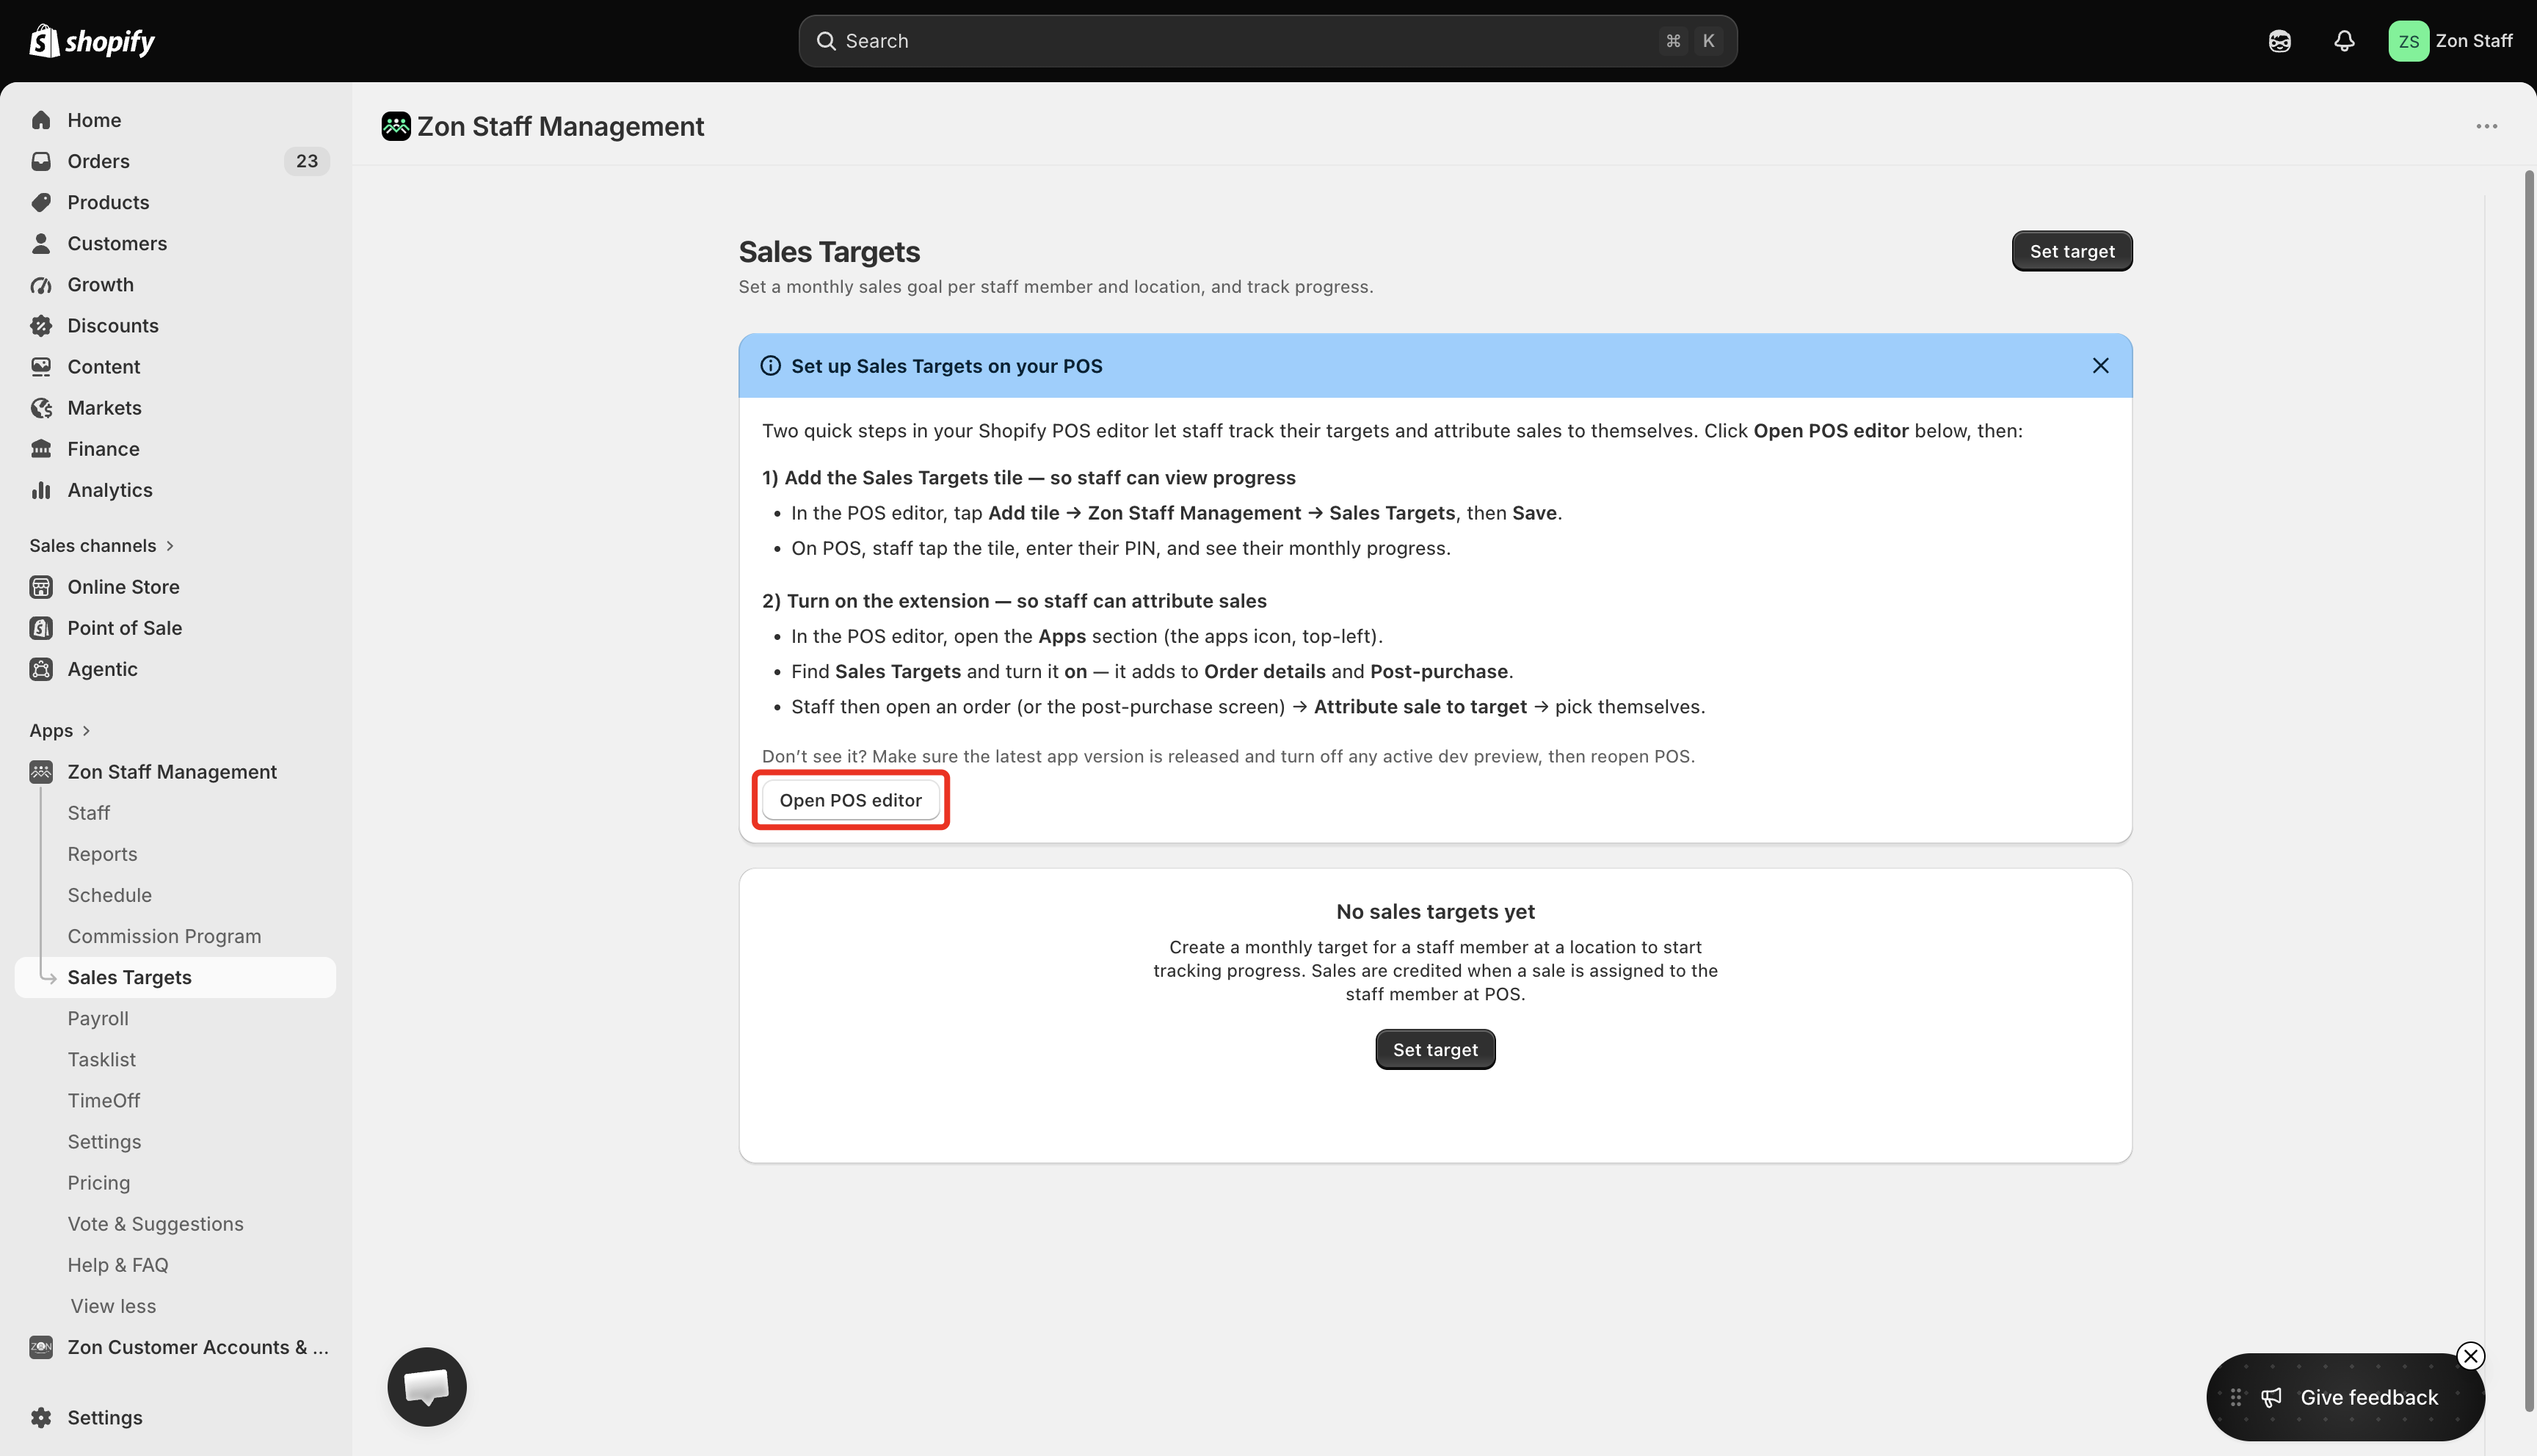
1. In Shopify admin, open **Zon Staff Management**.
2. Go to the **Sales Targets** tab.
3. Click the **Open POS editor** button.
After clicking **Open POS editor**, you will be redirected directly to the **Shopify POS Editor** and the **App extensions** section.
4. Find **Sales Targets** in the list of app extensions.
5. Enable the **Sales Targets** extension.
6. Click **Save** in the top-right corner.

Once enabled, the **Attribute sale to target** option becomes available in:
* **Order details**.
* **Post-purchase screen**.
This extension is required for attributing sales to staff members. Enabling it does not add the Sales Targets tile to the POS device.
### 2. Add the Sales Targets Tile
The Sales Targets tile allows staff members to open the feature and view their monthly progress from the Shopify POS app.
The tile must be added to the Shopify POS app on the POS device through the POS editor.
1. Open the **Shopify POS app** on the POS device.
2. Enter your assigned **POS PIN** to access the POS system
3. Tap **Add tile**.\
4. Select **App** or **Zon Staff Management**, depending on the POS app layout.\
5. Choose **Sales Targets**.
6. **Add** the tile to the POS home screen.
7. Save the changes.
The Sales Targets tile will now be available on the Shopify POS app home screen.
Staff members can open the tile, enter their POS PIN, and view their progress for the current month.
> Adding the Sales Targets tile allows staff members to view their progress. The Sales Targets extension from Step 1 must also be enabled before staff can attribute sales.
### 3. Create Monthly Sales Targets
After enabling the extension and adding the tile, create monthly targets for your staff members.
1. In Shopify admin, open **Zon Staff Management**.
2. Go to the **Sales Targets** tab.
3. Click **Set target**.
4. Select the staff member or staff members for whom you want to create a target.
5. Select the relevant POS location.
6. Enter the monthly sales target amount.
7. Review the selected staff members, location, and target amount.
8. Click **Save**.\
The target will apply to the selected staff members at the selected location for the month.
### View Sales Target Progress
Merchants can view staff members’ sales-target progress directly from the **Sales Targets** tab in the **Zon Staff Management** app. They can also edit or delete sales targets from the same section.
After a target has been created, staff members can view their progress from the Shopify POS app.
1. Open the Shopify POS app on the POS device.
2. Sign in using the staff member’s POS PIN.
3. Tap the **Sales Targets** tile.
4. Review the progress for the current month.
Progress is based on sales attributed to that staff member.
### Attribute a Sale from Order Details
Staff members can attribute a completed sale from the order details page.
1. Open the relevant order in Shopify POS.
2. Open the order details.
3. Select **Attribute sale to target**.
4. Choose the staff member who should receive credit for the sale.
5. Confirm the selection.
The sale will then be associated with the selected staff member and contribute to their monthly sales-target progress.
### Attribute a Sale After Purchase
Sales can also be attributed immediately after the purchase is completed.
1. Complete the sale in Shopify POS.
2. On the post-purchase screen, select **Attribute sale to target**.
3. Choose the staff member who should receive credit for the sale.
4. Confirm the selection.
The attributed sale will be included in the selected staff member’s progress.
### Staff Workflow
Once Sales Targets has been configured, staff members can follow this workflow:
1. Sign in to Shopify POS using their PIN.
2. Open the **Sales Targets** tile to check their monthly progress.
3. Complete a customer sale.
4. Open **Attribute sale to target** from the order details or post-purchase screen.
5. Select themselves as the staff member receiving credit.
6. Continue checking their progress throughout the month.
###